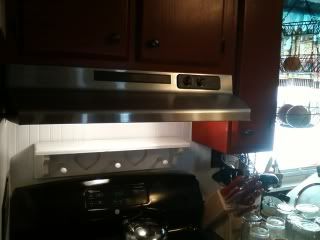
I got a few things done this weekend before I had to get back on the road. I Installed a new range hood Saturday afternoon. We had a range hood but it was old and the knobs didn't work so it was just useless sitting there above the stove for the last three years. They are not that expensive so I am ashamed that it took me this long to get to it. We looked all over town, well at the two places in town that would have them, and only found white and almond. Our kitchen is crimson, white and gray. Alabama Crimson Tide Colors, so almond is out and white is to bright. What we really wanted was black but that one is hard to find for some reason. So we headed north 18 miles to Greenville, stopped off at the Huddle House and had some lunch then headed to Buchheit's. Wow do we love this place! If I was a farmer I would be in heaven in there. Wait, I am in heaven in there. They had a stainless hood for around a hundred bucks and was pretty easy to put in. Now I will be able to have better pictures when I get to taking them while we are cooking.
That white shelf above the stove has to go though. when you are standing there cooking and you want something from the shelf you have to stoop to get it as the shelf part is too high up. I need one where the shelf is on the bottom of the backing not the top. I thought of hanging this one upside down but then the hearts would be upside down and that would be silly. It will have to do for now.
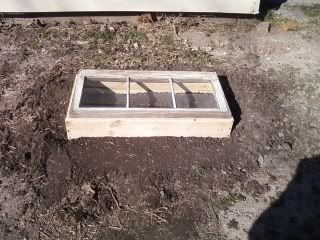
One other thing that I got done was I built my first cold frame and set it out. I planted just two short rows of iceberg lettuce in it since it was kinda small. It is only about 34 inches by,,well,,I Don't remember. Its small. I was a little off with my measurements so there is a a small gap in one end but I built it with screws so I can take it apart and square it up when I have time. The old window is just sitting on the top of it for now, once I square it up I will hinge the window and create some sort of prop system to prop the window open during warm days.
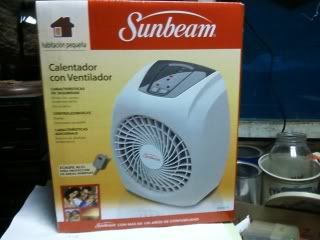
By the way, that little heater that we bought to use in the plant incubator didn't work out. It would cut off at the right temperature but would not come back on. I think that it was getting over heated in there. We put one of our bigger heaters in there that just has a dial and a high low button on it. I found a better thermometer and set the heater on low. Then adjusted the dial until I had around 78 degrees constant. It seems to be working well. There are no seedlings up yet so I hope that the little heater's problem didn't cause me to lose what I planted. I should see something this weekend I hope.
Things to look forward to? I was at a hospital auxiliary book sale last weekend and found the cook book section right off. They had a sale on Hardbacks for a dollar and after 3 P.M. they were half off so I got a mess of them for fifty cents. I bought a bunch of cook books there. I am mostly into the older ones from the fifties and sixties along with anything older. I have some great ones now from that sale. Look for some cool stuff from that as soon as I get time to go through them. I'll get to it sooner or later, remember that I am an over the road truck driver trapped in this occupation and have to drive to make a living. I'll someday be out of this truck and into the kitchen full time but until then trucking is eating up all my time. Stay tuned.
Tim
Tuesday, February 28, 2012
Tuesday, February 21, 2012
Our Plant Incubator
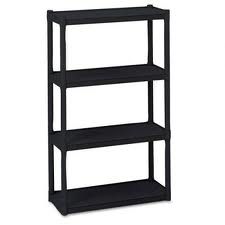
Well I got the plant incubator done this past weekend, it turned out pretty good for a thrown together idea. Here is what I started with.This is a picture of a three shelf set, what I ended up using was a four shelf set as the three shelf one had curved shelves in the front and would have caused some major modifications to the Styrofoam.
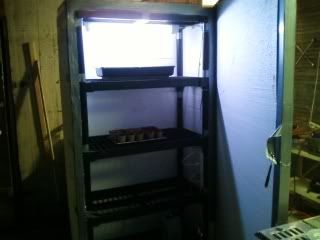
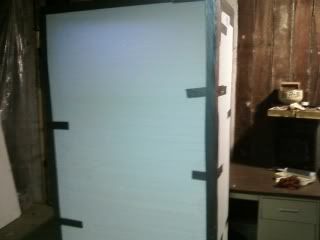
I cut the Styrofoam to fit the back of the shelves then the sides, all were attached to the shelves with duct tape. In future designs I intend to come up with a more permanent solution possibly using screws and washers. But for now this will work. I cut another sheet to make the door and used about a half a roll of tape to hinge the thing. Again in the future I intend to frame out the door so I can hing it properly. But for now it will serve it's purpose for this season's garden.
It is just latched by two doubled pieces of tape with small screwdrivers jammed into the side for now, again, another design for closing it is rolling around in my head. The light is a grow light from Wal-Mart that cost around ten dollars, there is an outlet bar zip tied to one side that it plugs into. This weekend i am going to add another light for the second shelf. At the moment I don't have the light on as the seeds are not up yet.
we bought this little heater at Wally World for about seventeen bucks, it is wonderful as it has a thermostatic setup on it where you can set it for 65, 70, 75, or 80 degrees. I have it set for 70 degrees and when you open the door you get blasted with a wave of heat. This Incubator works great! The light and the wires from it as well as the heater are all zip tied in place.
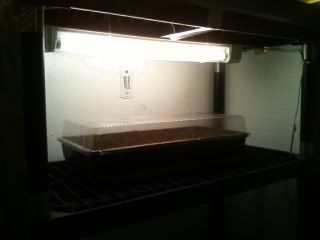
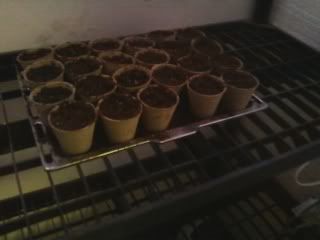
This is the first tray of seeds that I put in it. You can see the .99 cent thermometer on the back wall, also from wally World. I have about 6 varieties of Tomato's, about five Varieties of Peppers, some Cabbage, Broccoli and Brussel Sprouts and God know what else started in this one.
More seeds started here. I later had to put some plastic over this one as the heater was sucking up all the moisture. there is some types of Romain started in here and some Squash as well.
Here it is all sealed up. I cut a vent in the bottom of the left side, it is about a three inch by three inch square, there is another one on the same side up top. It vents very well, the heater works great. I need to add one thing next weekend, I need to put a piece of plywood on half the shelf over the heater to protect it from any moisture dripping from the plants after they are up. I'll show you a better view of that after next weekend. It may be rudimentary but it works like a charm.
Labels:
Bedding Plants,
Garden,
Nursery,
Plant incubator,
Plants
Thursday, February 16, 2012
Starting Plants For The Garden
Here is just an update of sorts, we have had our own kitchen garden ever since we moved north to Illinois and this year will be no different. I attempted to build a plastic room about the size of a large shower stall out in the garage to heat and start our garden plants in but I think that the plastic was way too thin because the small heater that runs us out of our computer/sewing room couldn't heat that plastic room higher than 30 degrees when the outside temp was 22. I took pictures of it but after it was determined to be a total failure I decided not to post them. Epic Fail!
Plan B was for me to build a couple of smaller desktop insulated boxes with a light inside along with a vent fan connected to an attic fan thermostat. My thoughts were that the florescent lights could heat the thing and grow the plants and the thermostatic fan could cool it down if it got too hot. I thought about something that I see at work and changed to plan C.
We go down to Florida from time to time and reload down there with frozen orange juice. sometimes on the same load we load "Cooler" juice that is not to be frozen so we have to buy these 4 x 8 sheets of 2 inch thick Styrofoam bulkheads to separate the freezer stuff in the nose of the trailer from the cooler stuff in the rear. Usually we toss this stuff in the trash first chance we get after unloading because it is in the way. But sometimes those trailers end up at our yard and have to be cleaned out. I called the boss yesterday to ask what they did with those panels, if they threw them out or saved them for future use? It just so happens that they have a few of them on hand in the warehouse and I am welcome to some of them.
Here is plan C. I have some stackable shelves out in the garage, you know the type that has black plastic shelves with gray or black plastic tubes in the corners to add more shelves? I have two sets of those in the garage and I plan to take whichever set has the most distance between shelves and encase it with these Styrofoam sheets on three sides and the top. I will then create an insulted front door or doors that can be opened to check the plants inside. We bought a heater that has its own thermostat so we can set it for 70 degrees inside so there won't be much of a need for a cooling fan. Walmart has encased under cabinet grow lights for about $20 or I could use the curly cue screw in types with some existing light fixtures I already have. At any rate there is going to be some seeds started for the Crimson Kitchen's, kitchen garden this weekend.
If I find that it gets too hot inside due to the weird winter we are having I have an attic fan thermostat up in the attic, all I need to do is make sure that it still works and find a small fan to vent to upper level of the plant incubator. I will take some pictures of this contraption as I'm making it so I will be able to post some later. These sheets of Styrofoam are a blessing, they cost around $20.00 if you had to buy them from the hardware store. some of the plants that we are going to start are green peppers, yellow peppers, sweet red peppers, Jalapenos, Anaheim chili's, about 6 varieties of Tomato's, some Broccoli, cabbage, and whatever I might have forgot. If this incubator turns out the way I think it is, it should hold about 100 plants. This warm winter has me wanting to till the garden right now. I hope that it doesn't smack us in the face this March since it has been relatively calm so far. More late after I get this project started.
TIM
Thursday, February 2, 2012
GERMAN PANCAKES
Recently I discovered a recipe that was a little odd to say the least. I have about 150 or more cook books most of them very old but I was browsing the Internet when I found this one. Have you ever heard of a German Pancake? I know that I had never heard of it but let me tell you, it looked delicious and we were not to be disappointed, it was fantastic! This is a very simple recipe and I am shocked that I have never seen this before. Of course my mother has heard of it, she seems to know everything. We even nicknamed her Google.
OK here is what you need
An 8 inch cast iron skillet ( there is a recipe for a 16 inch I'll put that at the bottom)
1/4 cup of butter
1 cup of milk
4 eggs
1/2 tsp vanilla extract ( I used a smidge more, I like vanilla )
1 cup flour ( I used all purpose )
2 tbsp sugar
brown sugar
pecan pieces
Pre-heat your oven to 425 degrees
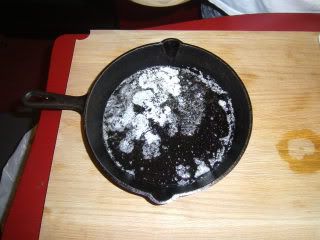
Place the butter in the skillet and place in the oven until butter is melted.
Combine the milk, eggs and vanilla in a bowl and beat until combined.
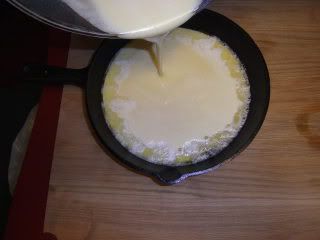
Stir in flour and sugar, beat until smooth. Then pour the batter into the hot buttered pan.
Bake for 18-20 minutes or until it is puffed up and brown around the edges. Don't freak out when this thing climbs up over the top of the pan. Trust me, it won't go anywhere.
It will have a delish butter slick on top when you take it out. At this point is where I added my soul to this dish. Once it was out of the oven I sprinkled brown sugar all over the top and waited for that to caramelize before I cut it. The next time I make this I am going to carefully open the oven door and slide the oven rack out enough to add the Brown Sugar and the pecan pieces at about the 16 minute mark.
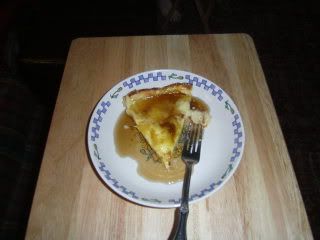
We poured some maple syrup over it and between me and Kim, well,,,,we devoured it!
It was light and creamy in the middle almost like a whipped cheese cake filling. It really is hard to describe, you just have to taste it for yourself.
Here is the recipe for the 16 inch skillet version. if you have a large family I recommend that you use it or bake two 8 inch skillets at the same time.
16 inch cast iron skillet
3/4 cup of butter
3 cups of milk
12 eggs
1.5 tsp vanilla extract
3 cups all flour
6 tbsp sugar
I would expect that the cooking time is roughly the same, just watch the edge so it doesn't burn.
I hope you enjoy this I know we did immensely!
Tim
OK here is what you need
An 8 inch cast iron skillet ( there is a recipe for a 16 inch I'll put that at the bottom)
1/4 cup of butter
1 cup of milk
4 eggs
1/2 tsp vanilla extract ( I used a smidge more, I like vanilla )
1 cup flour ( I used all purpose )
2 tbsp sugar
brown sugar
pecan pieces
Pre-heat your oven to 425 degrees
Place the butter in the skillet and place in the oven until butter is melted.
Combine the milk, eggs and vanilla in a bowl and beat until combined.
Stir in flour and sugar, beat until smooth. Then pour the batter into the hot buttered pan.
Bake for 18-20 minutes or until it is puffed up and brown around the edges. Don't freak out when this thing climbs up over the top of the pan. Trust me, it won't go anywhere.
We poured some maple syrup over it and between me and Kim, well,,,,we devoured it!
It was light and creamy in the middle almost like a whipped cheese cake filling. It really is hard to describe, you just have to taste it for yourself.
Here is the recipe for the 16 inch skillet version. if you have a large family I recommend that you use it or bake two 8 inch skillets at the same time.
16 inch cast iron skillet
3/4 cup of butter
3 cups of milk
12 eggs
1.5 tsp vanilla extract
3 cups all flour
6 tbsp sugar
I would expect that the cooking time is roughly the same, just watch the edge so it doesn't burn.
I hope you enjoy this I know we did immensely!
Tim
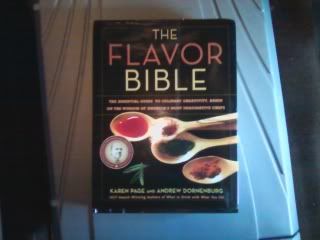
THE FLAVOR BIBLE
well what can I say, here I am still in this truck driving my life away instead of cooking and gardening. I am in Wisconsin at the moment waiting on Walmart to get me unloaded, then I will head to Appleton and reload headed to St. Louis. From there I hope I am going home for the weekend. It is SuperBowl Sunday but I don't really care about that. I do however hope that the Giants whip the stuffin out of the Patriots.
In food news My daughter gave me a book for Christmas!
This is an amazing book! It has all kinds of secrets from chefs around the world in it. It is really a manual on how food flavor profiles work together. In this book the vast majority of the pages are filled with a flavor table of sorts. It lists the ingredient and then lists the tyoe of flavor it is, for instance whether or not it is salty, sweet, bitter, etc. then the strength of the flavor, the heaviness of the item itself (dense, light, etc) and the season that it is at its peak flavor. After that brief introduction you get a listing of the other flavors or ingredients that it goes well with. There are bolt typed ingredients that are highly recommended by the experts and then there are bold typed with an * symbol, these are the " Holy Grail " of that ingredient's flavor profile. For instance, Tomato's and Basil are a holy grail.
I have read through this book to about the half way point and have not found many holy grails, those that I have found made perfect sense to me. I look forward to inventing through this book in the future. Gotta go they just called me on the radio to tell me that my trailer is empty.
More on this book later and I have news on the garden front as well. We have a new member in the family in the cultivating category.
peace
Tim
Subscribe to:
Posts (Atom)
